Using Selenium WebDriver With Java for Automated Testing: Part II
Create a Maven Project and Run Your First Test


In Part I of this article series we installed Java, Maven and IntelliJ IDEA to prepare for running our first browser test. In this article, we'll perform the remaining tasks and run our test.
Create a Maven Project
Previously, we downloaded, and installed Maven (which consisted of only placing it on the C:\ drive), and set all the environment variables so that when we run our test all the paths are found. Now we need to create a Maven project in IntelliJ IDEA.
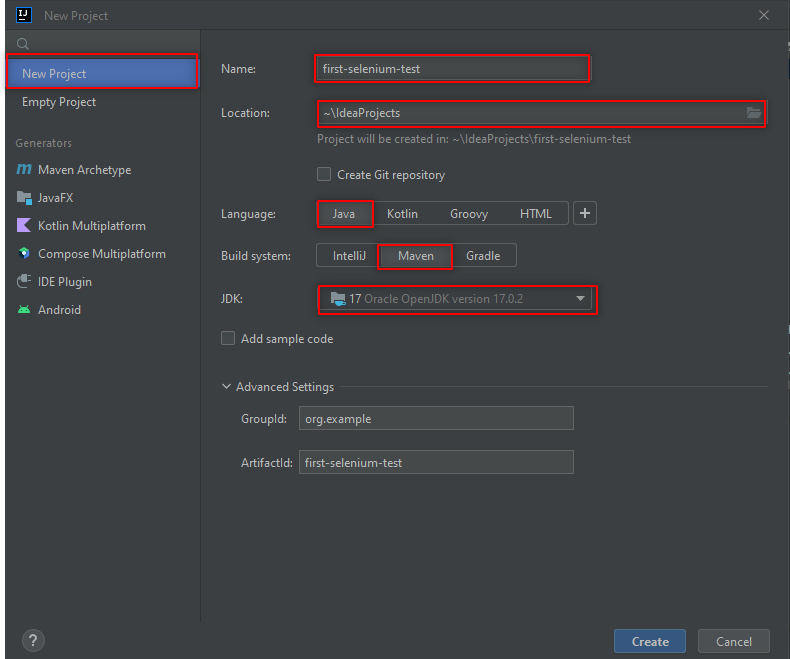
Open IntelliJ IDEA.
**New Project **should be selected by default. If it is not, make sure to select it.
Enter the name of your project in the Name field.
Your project's location will default to the **Location **field in the project directory that IntelliJ creates during installation. You can use this location or select the directory icon at the end of the field to pull up the Select Project File Directory dialog. From this, you can choose the location to house your project directory.
Make sure the language you will use to write your test script is highlighted under Languages. In this case, we are using Java, so it is selected.
For Build System make sure that you have Maven selected.
The JDK field will default to the latest one that is installed. In case you have multiple versions, select the one you want to use.
Hit the Create button to create your project.
The project will take a few moments to be created. Wait until all directories and files are created. Once the project is created the directory structure will look like this:
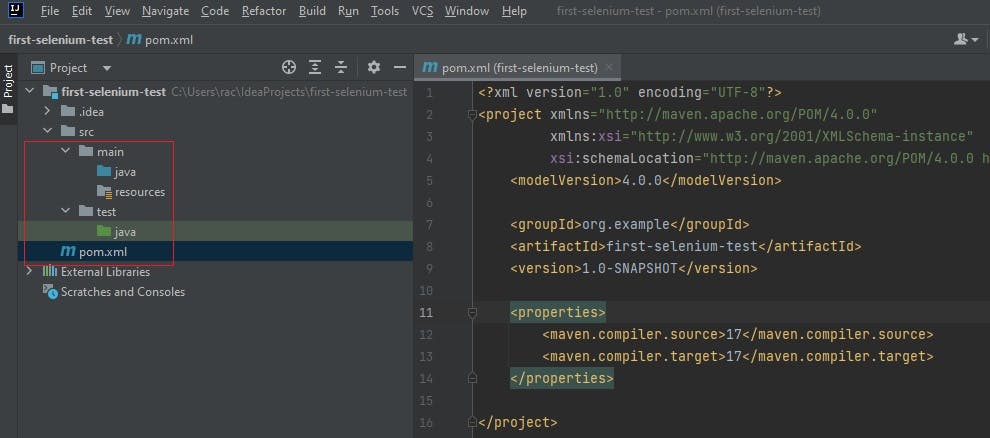
The way this Maven project is structured is great to adhere to best practices when building a testing framework and organizing all the test components. The first Java folder located under the Main directory will house core framework components like page objects. The second Java folder located under the Test directory will house all the tests that are to be run like the first browser test for this project.
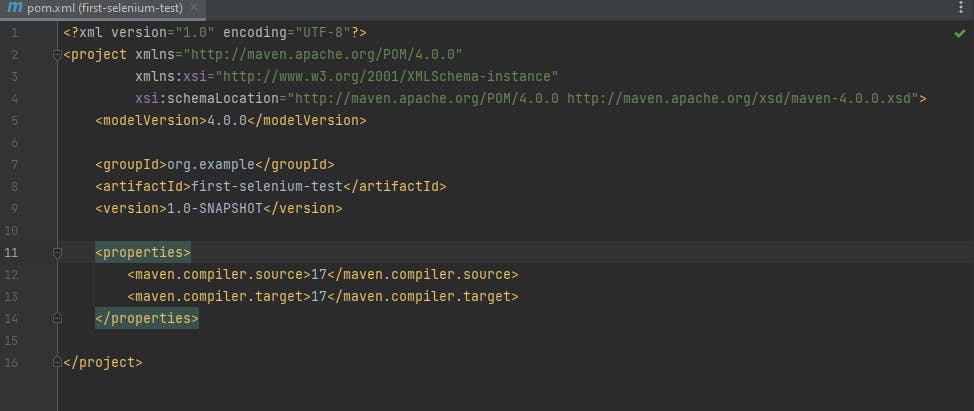
POM.xml
The POM.xml file which is created with the Maven project is very important for including information about the project's configuration, dependencies, plugins, build profiles and all the data Maven will use to build the project. In-depth information can be found on the Apache Maven Project website.
WebDriverManager
WebDriverManger is an open-source Java library that is useful for managing all the browser drivers that you might use while testing. Instead of installing each driver individually and having to add the location of the installed driver in your test's code, simply add the following dependency to the Maven POM.xml file and this code will be downloaded from the Maven Central Repository which holds the most commonly used libraries.
Writing Your First Test
Let's write the first test and dissect each part as we go. First, let's make sure our POM.xml file has all the dependencies added that we'll need.
Maven Compiler Plugin
<!-- https://mvnrepository.com/artifact/org.apache.maven.plugins/maven-compiler-plugin -->
<dependency>
    <groupID>io.github.bonigarcia</groupID>
    <artifactID>webdrivermanager</artifactID>
    <version>4.0</version>
    <scope>test</scope>
</dependency>
Selenium WebDriver
<!-- https://mvnrepository.com/artifact/org.seleniumhq.selenium/selenium-java -->
<dependency>
    <groupID>io.github.bonigarcia</groupID>
    <artifactID>webdrivermanager</artifactID>
    <version>4.0</version>
    <scope>test</scope>
</dependency>
Web Driver Manager
<!-- https://mvnrepository.com/artifact/io.github.bonigarcia/webdrivermanager -->
<dependency>
    <groupID>io.github.bonigarcia</groupID>
    <artifactID>webdrivermanager</artifactID>
    <version>4.0</version>
    <scope>test</scope>
</dependency>
Under the Java folder, right-click and select New > Java Class
Name your Java Class file using the correct conventions with .java as the file extension ex:
FirstSeleniumTest.java
Write your test class using the correct Class naming conventions ex:
    public class SecondSeleniumTest {
           public static void main(String[] args) {
- Instantiate your Chrome Driver class ex:
    WebDriverManager.chromedriver().setup();
    WebDriver driver = new ChromeDriver();
- Use the driver.get method to open your Chrome browser and the target URL and the driver.close method to close the browser once done.
    driver.get("https://demoqa.com");
    driver.close();
- Right-click your methods (WebDriverManager, WebDriver, ChromeDriver, get, and close) to import the class package from the Maven repository.
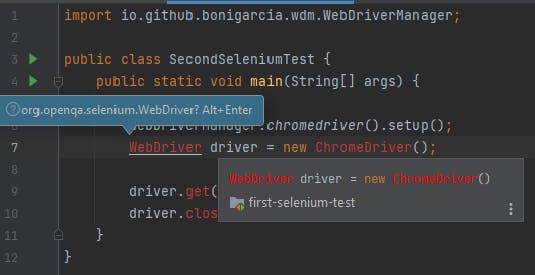
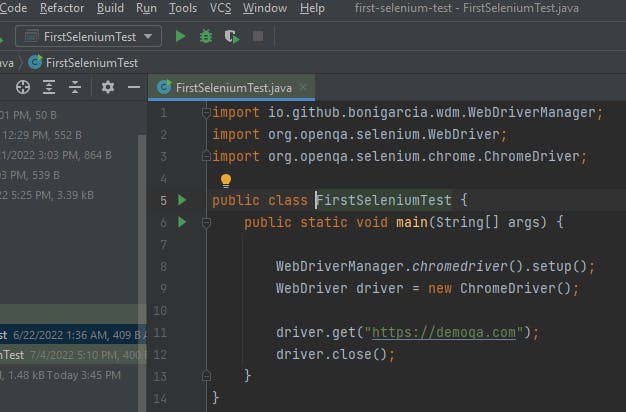
import io.github.bonigarcia.wdm.WebDriverManager;
import org.openqa.selenium.WebDriver;
import org.openqa.selenium.chrome.ChromeDriver;

public class FirstSeleniumTest {
    public static void main(String[] args) {

        WebDriverManager.chromedriver().setup();
        WebDriver driver = new ChromeDriver();

        driver.get("https://demoqa.com");
        driver.close();
    }
}
Run Your Test
Use the green run arrows to run your test in IntelliJ. For this test, any of the green arrows can be used.